A while ago, I published a blog post about making your own corner of the web. That tutorial is great if you want to get started with self-hosting, or want something you did really all by yourself.
However, let’s consider a few things: following the previous tutorial might not be that easy if you don’t have any previous bases in Linux system administration; also it will cost money to get a domain and some just can’t afford that.
So this time, let’s take the easy route. While some will say it’s not an ideal way of having a website, I disagree: having a website at all is a good first step. It’ll be up to future you to decide if you want to continue further in the journey, or if what you’ve made after this tutorial is just enough for you.
This time, there are no fancy requirements that will cost you money, only the following:
- About 15-30 minutes of free time
- An account on either:
- GitHub
- GitLab (GitLab.com or other instance)
- Forgejo (Codeberg or other instance)
- Some basic knowledge of Git (refresher here)
- Some kind of Text Editor
This tutorial will also be cut in multiple parts, concerning each of the platforms. In any case, on each of the ones listed, there is a feature called “Pages”, allowing you to host static websites, for completely free!
This tutorial will focus on hosting a simple HTML page, but then feel free to look into “static site generators”. Static sites generator will generally take in a bunch of Markdown documents, then generate a static HTML website from it.
GitHub
Creating a static website on GitHub is extremely simple. For this, create a new repo, for instance, called username.github.io. Of course, replace username by your actual GitHub username.
Now, time to make your website come to life! Clone the repository locally and open it in your text editor.
The first file we’re gonna add is at the root and named .nojekyll. To explain a bit more, by default, GitHub Pages uses the Jekyll static site generator. Adding this empty file just disables it for the moment as we just want a simple static website.
Now, time to edit our index.html file, for instance:
<!DOCTYPE html>
<html lang="en">

	<head>
		<meta charset="utf-8">
		<title>My amazing website</title>
	</head>

	<body>
		<h1>Jae's Amazing Website</h1>
		<p>Welcome to my website! Made with GitHub Pages.</p>
	</body>
</html>As always, feel free to put whatever in here, this is just provided as an example.
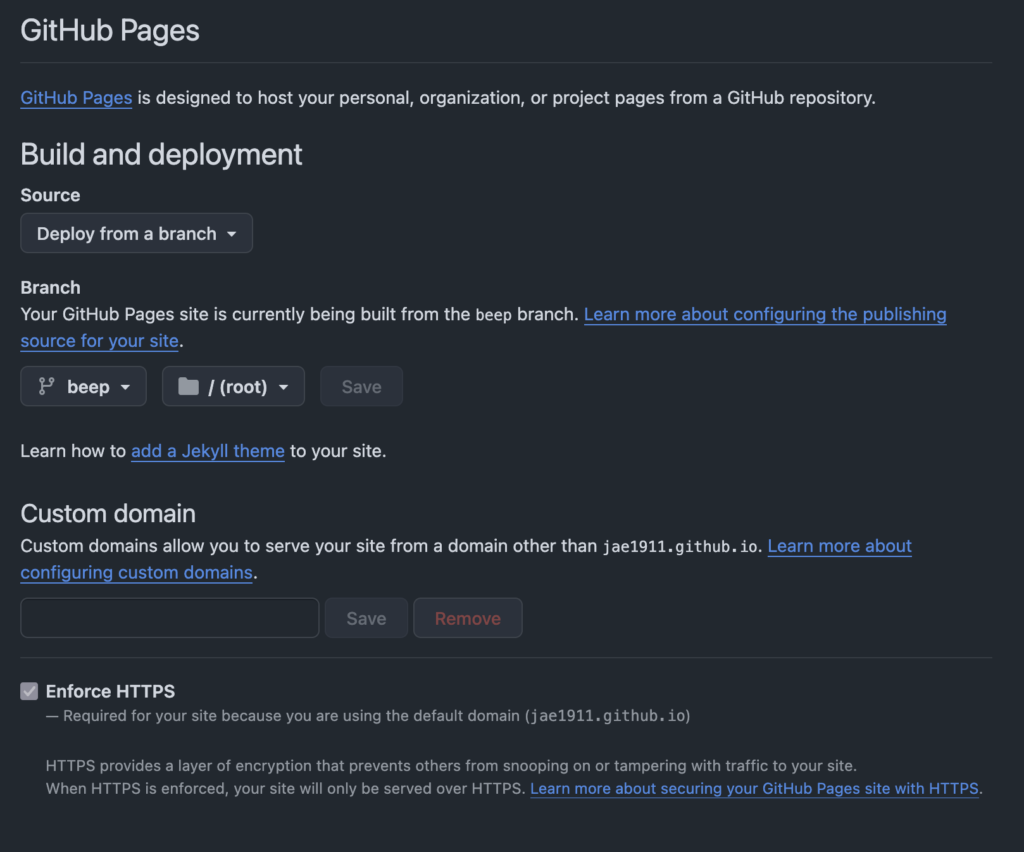
Once you’re done, commit and push your new website to the repository and this should automatically enabled GitHub Pages. In case it didn’t automatically do it, go in the repository settings, scroll down to “GitHub Pages”, in source select “Deploy from a branch”, for the Branch select the default one (“beep” for instance here) and hit “save” once you’re done.
You should also notice some coloured icon near your commit. When it turns green (which shouldn’t take more than a minute or two), time to visit your new website! In this case, the domain should be the same as your repository: username.github.io (for instance, mine is at jae1911.github.io).
And voilà, your own website, made in less than 10 minutes, using only GitHub. As a demo, you can find my website repository on my GitHub profile as well.
GitLab
Small note before we begin with GitLab: if you use another instance than GitLab.com, the instance owner will need to enable the “Pages” feature in configuration. In this example, we’re gonna use GitLab.com to show what a standard user can do without having to look around for an instance.
In this case, the beginning is very similar as for GitHub, create a new repository named username.gitlab.io (once again replacing “username” by your own username). As with GitHub, clone the repository locally and open it using your code editor.
This time, first thing: create a new folder called public. This is where your website files will go. For instance, in public/index.html:
<!DOCTYPE html>
<html lang="en">

	<head>
		<meta charset="utf-8">
		<title>My amazing website</title>
	</head>

	<body>
		<h1>Jae's Amazing Website</h1>
		<p>Welcome to my website! Made with GitLab Pages.</p>
	</body>
</html>Now GitLab Pages will require another configuration file located at the root of the repository to work. This one just tells GitLab “all the website files are in public”. Name the file .gitlab-ci.yml and fill it with:
stages:
  - deploy

deploy:
  stage: deploy
  image: alpine

  rules:
    - if: $CI_COMMIT_REF_NAME == $CI_DEFAULT_BRANCH

  before_script:
    - apk add brotli

  script:
    - find public -type f -regex '.*\.\(htm\|html\|xml\|txt\|text\|js\|css\|svg\)$' -exec gzip -f -k {} \;
    - find public -type f -regex '.*\.\(htm\|html\|xml\|txt\|text\|js\|css\|svg\)$' -exec brotli -f -k {} \;

  artifacts:
    paths:
      - public/

pages: trueIn this case, there are two small steps to compress the end website with Brotli and GZIP.
Usually, it should be of the style username.gitlab.io. Once again, you can see mine on j4lc.gitlab.io and its repository.
Forgejo
In this example of Forgejo, we’re gonna use Codeberg as it’s fairly known and has a great reputation overall.
Creating a website is even easier there, just create a repository, and a branch named pages then put your HTML on it, for instance:
<!DOCTYPE html>
<html lang="en">

        <head>
                <meta charset="utf-8">
                <title>My amazing website</title>
        </head>

        <body>
                <h1>Jae's Amazing Website</h1>
                <p>Welcome to my website! Made with Codeberg Pages.</p>
        </body>
</html>Now, before pushing, go in the repository settings, and the webhook section. There, add a new “Forgejo” webhook with the following data:
- Target
https://<your username>.codeberg.page/<repository name>/ - Branch filter
pages

Once you have validated, you can now push, and it’ll get deployed. For instance, you can check mine out.

Leave a Reply