Jae's Blog

Starbound, 10 years later

I recently started playing Starbound again after a hiatus of a few years.

For the context, I have a pretty big history with the game, buying one of the old supporter tiers (Pixel Tier, in March 2014) and playing though all the first betas up until the final release and subsequent (rare) updates. I also ended up contributing quite a lot to the mod adding French translations to the game which was fairly fun to me at the time.

This time, I’m not using the official game client, but rather another one called OpenStarbound which corrects some bugs and adds some features taken from other patch sets.

It’s honestly good to see that the community still has its passion for the game, and still maintaining that sort of stuff.

Here are some pics of my colony, made on the first planet I spawned on:

I finished the main quest in about 5 hours of gameplay, without rushing for anything and right now progressing through the endgame steadily.

I still need to get all the unique boss drops to upgrade them to on the weapons upgrade anvil at some point. The bounty hunter side also needs some work.

And yes, this is basically without any content mods, the vanilla game is fun enough to me.

Green bird in light clothes, with a summer hat and red wings.
My character being a basic Avian.
The European vulnerability database

I’ve recently discovered that the EU has their own vulnerability database: EUVD.

As noted by the message on top of the page:

This website is currently in its beta phase. We appreciate your collaboration in reporting any inaccurate or incomplete information via the link below “Provide feedback”.

The site is still in a really early stage, but hopefully it gains a bit more traction as the future of other vulnerability databases is uncertain (for instance, with CVE almost dying abruptly due to a contract ending).

As of now, there also are no feeds (RSS more particularly) to watch this database, so hopefully this will be added soon.

Configuring DNSSEC on systemd-resolved

Enabling DNSSEC on systemd-resolved is quite easy.

First, let’s go in /etc/systemd/resolved.conf.d/main.conf and add/modify the file like so:

[Resolve]
DNSSEC=true
Code language: JavaScript (javascript)

For good measure, you can also enable DoT (DNS Over TLS) in there, which you can use with something like DNS0.

Restart systemd-resolved using systemctl restart systemd-resolved and voilà.

Now, if you type something like resolvectl query j4.lc, you should get an answer like so:

j4.lc: 95.217.179.88                           -- link: enp6s0
       2a12:4946:9900:f00::f00                 -- link: enp6s0

-- Information acquired via protocol DNS in 141.7ms.
-- Data is authenticated: yes; Data was acquired via local or encrypted transport: yes
-- Data from: network
Code language: CSS (css)

On the contrary, if you try to query a domain which has an invalid signature, for instance with resolvectl query badsig.go.dnscheck.tools, you will get:

badsig.go.dnscheck.tools: resolve call failed: All attempts to contact name servers or networks failed
Code language: CSS (css)

Do note some domains might stop resolving because of this, in which case, contact their admin so they can correct the issue.

Also, on my side, resolution hangs rather than displaying a proper error, which seems to be something like this bug (or maybe another, haven’t looked too much into this yet) on the systemd issue tracker.

Signals on 14.090.00

On April 13th 2025, I managed to receive some odd signals on 14.090.00 which sounded just like packets of information being sent.

What’s weird is that I only heard this one this particular frequency twice, on the 13th and a day prior.

Here is a recording of those:

Currently, I’m using a Kenwood TS-430S with a homemade wire listening antenna.

I should receive a better antenna very soon, so maybe this frequency is allocated for something I am not aware of yet.

It’s a long weekend

Here in Finland, it’s the Good Friday, meaning we get this Friday and next Monday off work.

That’s plenty of time for me to re-play some of my favourite games, and on the menu this time: Yakuza Kiwami 2.

I’ve finished this one months ago, but remains the one with the best music in my opinion.

If you’re interested, you can grab it DRM-free on GOG, or just grab the (almost) whole series DRM-free.

I wish the more recent games such as Gaiden, Ishin, Infinite Wealth and Pirate Yakuza in Hawaii would be released on there, but hopefully this will happen soon enough.

If I manage to do what I wanted, I’ll go ahead and re-play Yakuza 6 as well, but we’ll see.

I’ll write a larger review of the series at some point in the future. In fact, it’s been in the works for a while, but I haven’t finished it due to the sheer amount of content in those games.

Changes in Posti’s data processing

If you live in Finland, you have without a doubt interacted with Posti. Recently, they announced large changes in their user data processing policies, taking into effect on May 20th 2025.

Bottom of the line is:

  • New targeted advertising (directly sending your data to Facebook, Google, Adform and many others)
  • Profiling of your data

To avoid getting caught in this, visit the account settings page (on my.account.posti.fi), then on the left, select “settings”.

In there you will need to uncheck two options:

  • “Use of customer data for targeted advertising (effective from 20 May)”
  • “Profiling (effective from 20 May)”

Also feel free to clean up any options you might have forgotten to disable before.

As a friendly reminder: do not forget to press “save changes” on the bottom of the page when done with the unchecking part.

With this, you should be pretty safe to proceed, tho just in case, I’d still watch this page just in case Posti has a magical bug that would re-enable everything for everyone.

Personally, I find this whole thing kinda scummy given Posti is an essential public service. Forcing that kind of analytics on people can only go badly on the long term.

Fedora 42 and new RSS reader

A few weeks ago, I finally did the final switched and completely nuked my Windows 11 install from my workstation.

The last thing that was keeping me on Windows, VR, is now pretty much painless on Linux. All of this thanks to the guides provided by Linux VR Adventures, and most particularly, the software Envision which allows you to set up and start everything is a very painless way.

As I mentioned multiple times in the past, my distro of choice is Fedora, given it’s really easy to install, use and maintain.

This week we also had some great news, a new Fedora version, 42 which brought on a bunch of cool stuff.

As expected the upgrade was painless, and now my workstation is shinier than ever (just ignore my awful PC building skills and the fact that some USB ports might be fried by now).

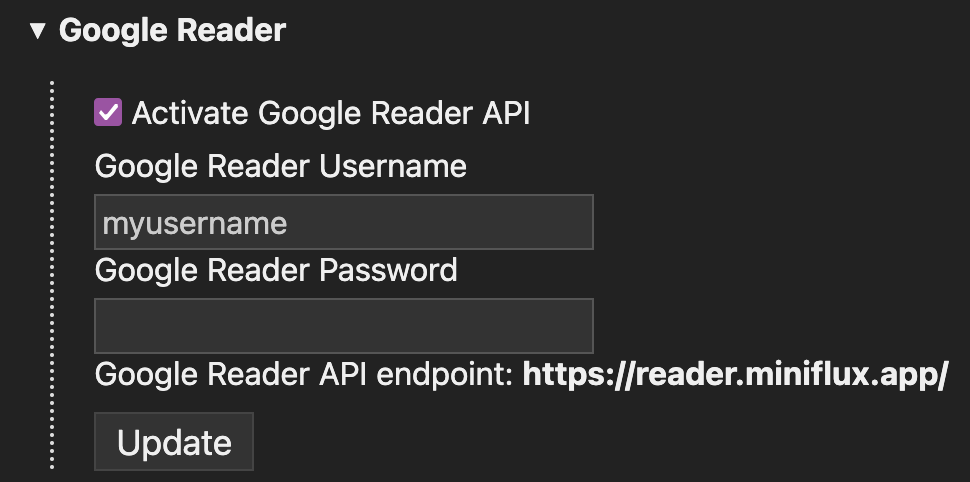
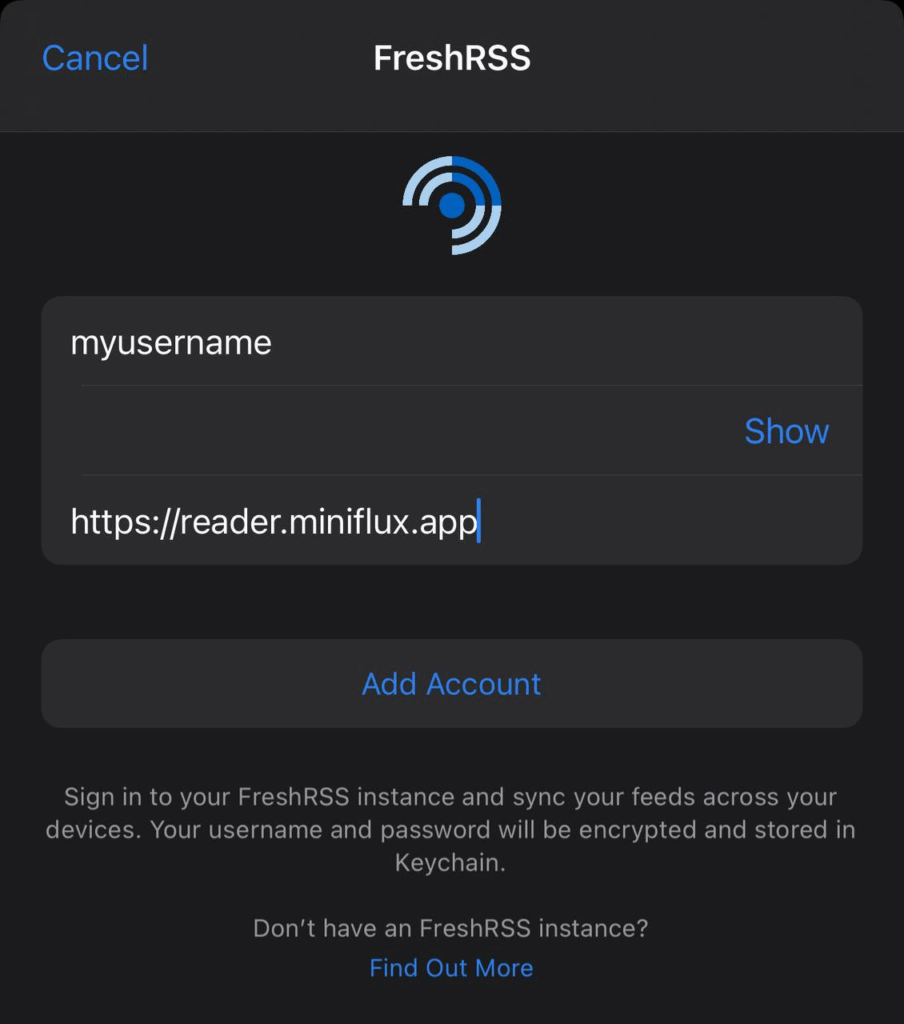
I also switched RSS readers and now using NewsFlash in combination with MiniFlux.

So far the setup has worked quite well, and I can access all my feeds on all my devices without having to copy config files around which is a big win by my books.

Moar blog stuff

Hey everybody!

Small update about this blog in particular.
As you may have noticed, the style has changed quite a lot and there are now categories on the right side of the page.

I’ve decided to make it easier for me to maintain this blog and write more in general, which was why I originally moved to Mataroa (but then left because of the lack of IPv6 support).

Since switching back to Hugo, writing stuff has been a bit offputting because it requires me to run stuff locally, managing drafts can be a bit of a hassle, especially when talking about really quick ideas.

So, now that my blog edition is more streamlined, expect more posts in the future!
Fear not, no links were broken in the migration, I made sure to add redirects everywhere.

Don’t forget to update the RSS URL in your favourite reader to https://b.j4.lc/feed/ instead.
The previous one should still work, and redirect, but it’s better to have the correct one.

Adding this afterwards, sorry if I accidentally spammed your RSS reader, I totally forgot to make sure posts wouldn’t be duplicated D:

Free spell checking

You probably know about Grammarly and other web browser add-ons that basically act as fancier spell checkers.
They’re expensive, a bit opaque, and you can’t really integrate them into whatever you want.

Well today, I’ll talk about LanguageTool. Despite offering full-blown plans, what is little known is that you can use it locally and host your own spell checker for free!

Setting this up

I personally use Fedora Linux, so this tutorial will assume you have a similar setup. This particular one should work for any Systemd-enabled distribution.

First, you’ll need to download the latest LanguageTool HTTP server snapshot from their mirror which should be in the form of a zip file, then unzip it which should leave you with a file named something like LanguageTool-6.6-SNAPSHOT (replace the 6.6-SNAPSHOT by the version you downloaded).

For simplicity’s sake, let’s rename LanguageTool-6.6-SNAPSHOT into languagetool and move it to our own folder with:

mv LanguageTool-6.6-SNAPSHOT languagetool
mv languagetool ~Code language: Bash (bash)

You can also go in that directory using cd ~/languagetool and type pwd to get the full path to there, we’ll need it a bit later.

Now, time to create a systemd service to start it automatically. First, we’re gonna have to create the folder ~/.config/systemd/user/ using mkdir -p ~/.config/systemd/user/.

Once this is done, you can then edit the languagetool.service file using your favourite editor, in my case, Sublime Text: subl ~/.config/systemd/user/languagetool.service.

In there, you can put the following sample service file, feel free to tweak it accordingly to your needs, but this should be good for most use cases (replace jae by your user):

[Unit]
Description=LanguageTool server
After=graphical.target

[Service]
WorkingDirectory=/home/jae/languagetool
ExecStart=java -cp languagetool-server.jar org.languagetool.server.HTTPServer --config server.properties --port 8081 --allow-origin

[Install]
WantedBy=default.target
Code language: JavaScript (javascript)

Before, anything, go in the ~/languagetool directory and create the server.properties file by using: touch ~/languagetool/server.properties.

Now time to start and enable the service:

systemctl --user start languagetool
systemctl --user enable languagetoolCode language: Bash (bash)

And there you go, your local LanguageTool server will be started automatically when you log into your session.

Now you, as a finishing touch, you can install the Firefox add-on, and once install, go in the settings, scroll all the way at the bottom, click on the “advanced settings” tab, and swap the “LanguageTool server” option to “local server”.

Congratulations, you now have an amazing spell checker in your browser for 100% free.

If you’re curious about how exactly that stuff works, you can see the full LanguageTool source on GitHub.

If you are a developer, check out their API docs to build stuff around it.

Making your own web corner

So, you’ve finally bought yourself a domain (or thinking about it), got a server at home, and now you want to host your own corner of the web?

Great! Allow me to be your guide through this journey.

Pre-requisites

You’ll need a bunch of stuff for this tutorial, including:

A domain

Your domain will be the public face and how people (and yourself) will access your corner, choose it wisely.

To get a domain, you need to choose a registrar first, to which you will register it. Registering a domain can cost a fee anywhere from 5€ to 5000€.

Some good registrars include:

  • Spaceship – Really cheap, you can get a .eu for just under 5€ there
  • Hetzner – Well-known hosting service & DNS registrar
  • PorkBun – Well-known, huge selection, cheap sometimes
  • Inwx – German registrar, good service

If your friends also have their own corners, ask them about their registrar, maybe they had good experiences with some others than listed here!

From now on, assume we just bought example.com as a domain. Of course, replace this example.com by the domain you just got in the next steps.

A server

Now here comes the part where you have to choose where your stuff will be hosted. There are multiple ways of doing this:

  • Run a spare computer at home (this tutorial will focus on this)
  • Use a hosting provider like Hetzner or Infomaniak (similar to the first option, so this tutorial also applies)
  • Use GitLab, GitHub or Codeberg pages to host a static website (not covered in this tutorial, coming soon!)

In this example, we assume you have a spare computer at home running Debian Linux.

The boring networking part

DNS stands for Domain Name System. You can read more about it on howdns.works, but the basic gist is:

  • IP addresses are hard for people to remember as-is
  • DNS puts in relation a domain name to an IP address
  • For instance: j4.lc will point to 2a12:4946:9900:f00::f00 when being looked up
  • There are a lot of DNS record types, but the most importants are A and AAAA here
  • A A record maps a domain name to an IPv4 address, for instance: j4.lc -> 95.217.179.88
  • A AAAA record maps a domain name to an IPv6 address, for instance: j4.lc -> 2a12:4946:9900:f00::f00

Pointing your domain to your server

First, let’s figure out what’s the public IP of your server. For this you can execute:

curl -4 ifconfig.me
curl -6 ifconfig.meCode language: Bash (bash)

If the second command fails, this means your ISP doesn’t supports IPv6. In any case, write those IPs down in a notepad and let’s move on.

You will then need to add a DNS record on your domain to point to your server. To do this, log onto your registar and direct yourself to the DNS control panel.

When adding a record, you will have a few properties to fill:

  • name – Which subdomain you want to use. Setting this to @ will mean the root of the domain, in our case example.com, setting this to anything else, for instance awoo will “create” the subdomain awoo.example.com and make it point to your IP instead of the root
  • type – We’ve seen this earlier, we want this to be A or AAAA depending of if we’re adding an IPv4 or IPv6 (both can be present at the same time)
  • ttl – This is the time (in seconds) the record will stay cached. Leave it as-is. This is how long you will have to wait when you do a change to this record for you to see it
  • data – The IP address you want the record to point to
  • proxy status – This is for CloudFlare only, this setting controls if we want our site to be through CloudFlare, let’s disable this for now

Note: you do not need to specify the port of your application in the record. It is up to the app you are using (for instance, a web browser) to query the right ports. Adding a record to 95.217.179.88:8080 will be invalid for instance.

In our example, we can set everything (once again replace with your own data):

  • Name: @
  • Type: AAAA
  • TTL: 60 (default)
  • Data: 2a12:4946:9900:f00::f00

Meaning our root domain example.com will resolve to 2a12:4946:9900:f00::f00.

We can also add a A record to provide IPv4 connectivity:

  • Name: @
  • Type: A
  • TTL: 60 (default)
  • Data: 95.217.179.88

Opening ports

Now that your domain is pointing to your home server, you will need to open a few ports to make it accessible from the outside.

First, here are the list of ports you need:

  • 80 is the default HTTP port that you will need to later to obtain SSL certificates
  • 443 is the default HTTPS port that you will need to serve your corner

You will then need to allow those two ports in two places:

  • Your OS firewall, can be done through ufw usually
  • Your router’s settings (also called “port opening”, “port redirection” and a lot of other names), make sure the two ports are open on both TCP and UDP and pointing to your home server

Warning: in some countries, some ISPs will not allow you to open those two ports. It’s probably because you are behind something called CGNAT which allows ISPs to share the same IP address between multiple customers.
If this is the case call your ISP to get a proper IP that is not behind CGNAT. If this is not possible, you will have to either rent a server at a hosting provider, or get a tunnel.

Once this is done, congratulations, the external world can now reach you.

Web server shenanigans

Now, to serve your corner to the external world, you will need a web server. In this case, we will use Caddy which is really easy to use and takes care of HTTPS renewals for you.

Installing a web server

First, we’re gonna need to install Caddy, it goes a bit like this:

sudo apt install -y debian-keyring debian-archive-keyring apt-transport-https curl
curl -1sLf 'https://dl.cloudsmith.io/public/caddy/stable/gpg.key' | sudo gpg --dearmor -o /usr/share/keyrings/caddy-stable-archive-keyring.gpg
curl -1sLf 'https://dl.cloudsmith.io/public/caddy/stable/debian.deb.txt' | sudo tee /etc/apt/sources.list.d/caddy-stable.list
sudo apt update
sudo apt install caddyCode language: Bash (bash)

After doing this, make sure Caddy is started and enabled (meaning it will start with the server) by doing:

sudo systemctl start caddy sudo systemctl enable caddy

Now, if you visit your domain, you will see the example Caddy page, meaning you are now online!

Editing the web server configuration

The configuration for Caddy is located at /etc/caddy/Caddyfile. You can see basic examples of it on the Caddy documentation website.

In our example, we’re gonna use the following simple configuration (as always, replace example.com by your domain):

https://example.com {
    root * /var/www/corner
    file_server
}
Code language: JavaScript (javascript)

Now, create the directory /var/www/corner and add your website files in there, for instance an index.html.

Restart Caddy using sudo systemctl restart caddy, wait a minute for the HTTPS certificate to be issued and you’re in business, you now have your own corner on the internet!

Have fun editing it and sharing it to your friends.
A blog post will be published later this month on how to create your own blog (for free) using GitLab pages!

Reading more

Here are some links to help you get started with your newfound internet home:

If you feel like I missed something, please do contact me and I will add it there.

Newer Posts · Older Posts
Jae 2012-2025, CC BY-SA 4.0 unless stated otherwise.