Mentioned briefly in my previous post about DMR, I am the proud owner of an Anytone AT-D168UV. Even tho it felt like a cheap radio at first, now that I understand more how it works and what the options do, it’s been really fun to operate.
For the brief specs, this model pushes around 5W in VHF and 4W in UHF, with the added benefit of supporting DMR. It also has enough memory to load the full list of DMR IDs (which you can find on the Pi-Star website). What I like the most is the full-colour screen on the device, this is my first handheld device like this.
I got it from another ham for fairly cheap, but it can usually be found for 150-200€ in retail, so not too bad for something DMR. That’s been my main DMR device since getting it, but until recently, I didn’t go around exploring all the settings.
Let’s get this in first: configuring the radio itself from the radio is a hassle, don’t do it. The screen is very cramped, and entering everything manually is going to take forever. Luckily, AnyTone gives us some software to configure it. Bad news is: it’s on Windows only. The Open-Source equivalent, CHIRP, is also awaiting support for this model, which I am hopeful it will get (if any of the CHIRP contributors are reading this, hit me up on my e-mail or Signal if you think I could help).
Right now, we’re gonna need to work around some issues, the first one being: needing Windows. That’s fairly easily solved, I just spun up some Windows 11 VM in GNOME boxes, and it can also pass through a USB device from the VM settings, sweet!
At this point, we’re set to tweak the radio, just one last thing I discovered when experimenting:
- Do not try to create two channels with the same everything but name and set the two in the same zone. This corrupts the settings for some reason, which will force you to re-upload everything.
- Uploading the full DMR ID list takes forever, so be patient. At first, I used a pretty shoddy cable which made the upload fail, so beware of that as well.
It took me some time to figure out how this model works (my only prior experience being cheap Baofeng radios), but got it figured out:
First, add your DMR ID to the list, as it’ll be the one used when transmitting (and that’s pretty important). I am not sure if the master ID does something for ham use, but filled that one as well with the same values.
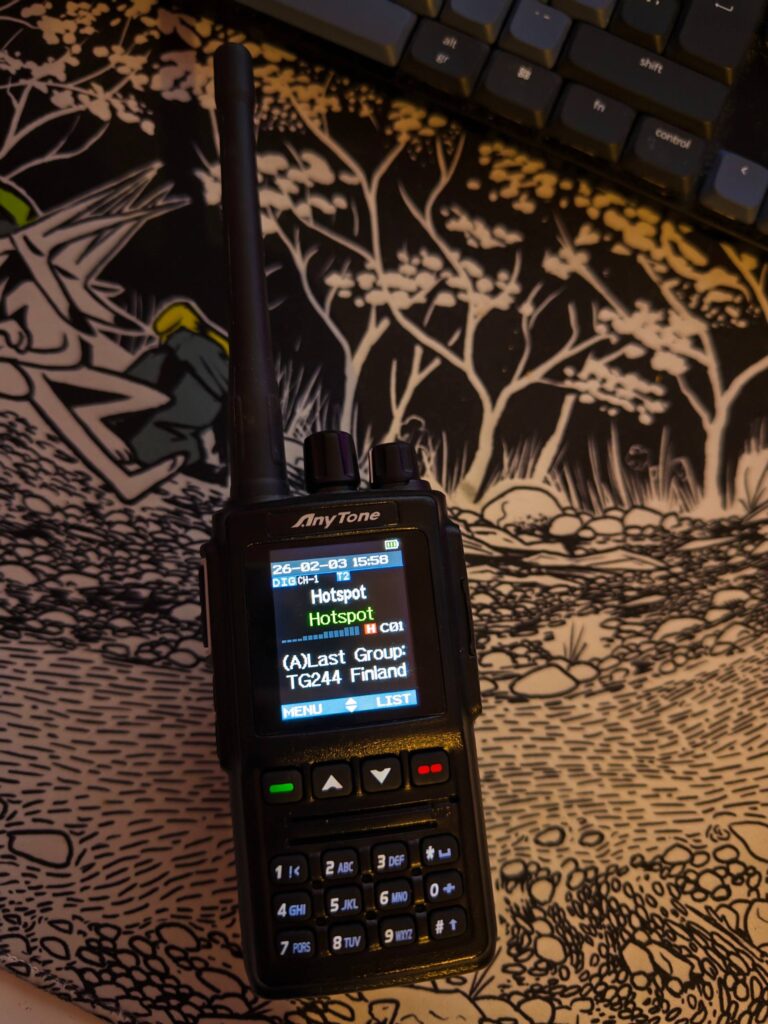
Then it goes that way: you can add channels, channels have a set frequency to transmit and receive; can have a specific DMR ID, default talkgroup, or CTCSS depending on if you want to hit an analogue relay. Once you have your channels, you need to add them into a zone; a zone will allow you to go through multiple channel with the middle knob on the radio; for instance, I have one setup for my hotspot, Helsinki and Hamburg, all with different local relays. You can change the zone by clicking the up and down arrows on the keypad.
Once this is all setup, time to send to the radio, wait for a bit, and voilà, it’s configured.
Other small bits of config I have tweaked are:
- Power-on interface: Custom Picture (more on that later).
- Standby char colour: white.
- Display channel number: Actual Channel Name.
- B Channel Name Colour: Orange.
- Zone Name Colour A: Green.
- Zone Name Colour B: Yellow.
- Separate display: On.
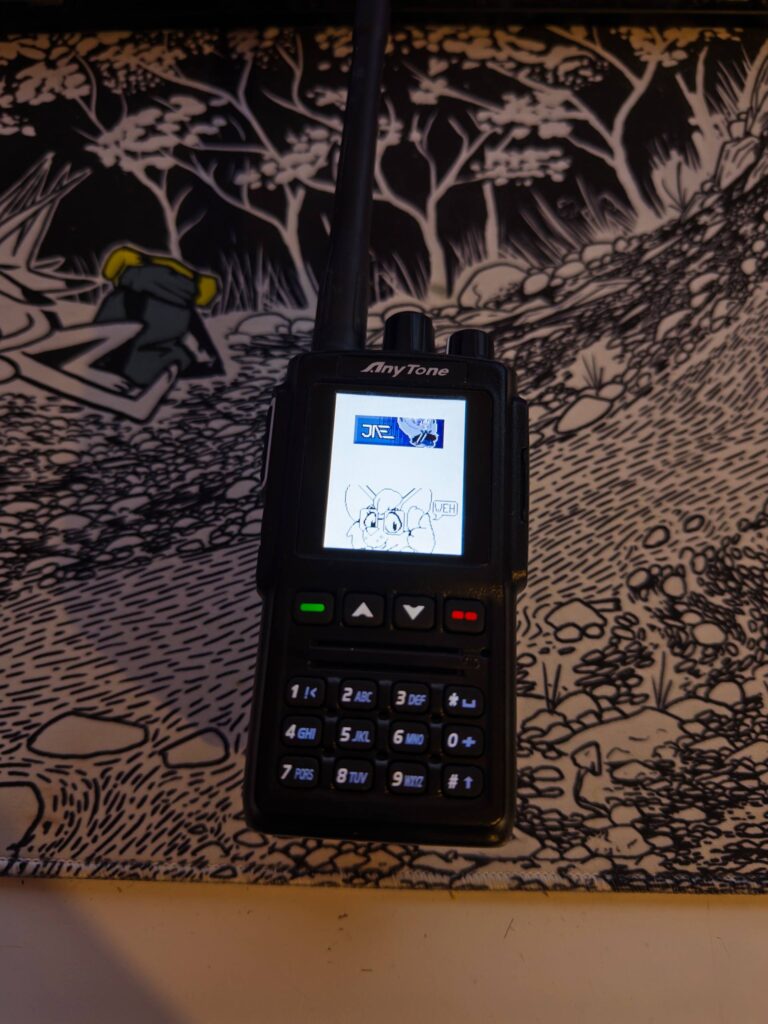
Now for some fun: you can actually set a custom background when the radio starts, or is on standby. The only restriction is that the picture needs to be 128×160, and JPG (apparently BMP is supported, but wasn’t working during my tests).
Just use the uploader tool in the software, and you’ll have a nice custom background as well.
2 Responses
Reply to jae
Captcha is fully local and provided by Altcha.
Your email address will not be published. Required fields are marked *
@b@b.j4.lc I still have barely experimented with DMR despite having a DMR capable radio, the whole thing is just somewhat intimidating to configure
Remote Reply
Original Comment URL
Your Profile
Yeah, the interfaces are kinda bad; but after sitting down and taking a good look at it, it ends up being fairly easy.
The gist is basically, set your DMR ID properly, setup a channel with a local repeater, and done; the info is just scattered everywhere (and shitty manufacturer websites don’t help either), so a bit hard to find sometimes.
I’m writing the last episode in the DMR series about hotspots (which should be out tomorrow). So far, it’s been the mode I’ve had the most fun with given it has tons of people, and was pretty easy for me to get into.